Now that we’ve had a chance to go over all the Option panes under the Compile sheet in Scrivener, I’d like to look at some scenario-based setup for compiling. First, let’s print a fiction novel for revising.
Binder and Project Settings
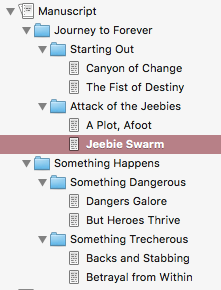 I’m going to show a setup using the Scrivener project template “Novel (with Parts).” This organization uses folders to create Parts, which contain Chapter folders, which contain Scenes in text files. The basic setup is the same if you choose the regular “Novel” project, which omits the extra level of folders for the Parts. This will mostly impact Separators and Formatting. With the “Parts” option, you will need to specify what happens between folders in the Separators pane (something you usually won’t need to specify with “Novel” projects), and with Formatting you will need to specify how the Compiler handles Parts titles and Chapter titles along with Scene titles (if you use them).
One thing you can do now that will help down the road is setting up some Formatting presets. Before starting on your actual writing, start by typing in just a little bit of text. Then, format it to within an inch of its life for your own use when editing the document in Scrivener. Set the font, font size, line height, inter-line spacing, paragraph spacing, tabs, first-line indent, hanging indent, whatever you want. Then when you’re satisfied, select the text you’ve formatted, and select the Format menu, then Formatting->New Preset From Selection. Give this preset a logical, obvious name, such as “Novel Editing” or “Novel Writing.” Then, change the formatting to the settings you will want when you are printing. Let’s say you like the font and paragraph spacing, but you need line height to be double-spaced (2.0), and font size to be slightly smaller (12 point instead of 14). Make those changes, then create a New Preset From Selection and give it a logical name such as “Novel Printing.” You can do this for each kind of output you need. I suggest that if you don’t edit your printed documents with the same settings as your submissions, then you might want to consider having a third option for “Novel Submission” that matches the criteria for your agent or publisher. Generic settings for submissions are usually: font face of Times, Times New Roman, or Courier, a font size of 12 point, black font color, 0.5” first line indent for new paragraphs, left aligned, and double-spaced (2.0 for line height).
Compile Options
When you compile to print for revising, there are a few changes you’ll want to consider. For some of these, you’ll see the images below to help. Many of the settings panes do not need any changing, or if they do it is reasonably straightforward to do it so I won’t demonstrate those. Set the "Compile For:" output at the bottom to "Print" to start.
First, make sure you have included all of the manuscript pages you want to include in the Contents pane, including any front matter you want. I recommend having a draft-only front matter folder, with only basic information (a title page with your name & contact information, the title, and not much else). This will help if you accidentally leave your manuscript behind in a coffee shop or library.
Under Print Settings, leave it in “Publishing Mode.” As you may remember from my entry on this pane, "Publishing Mode" really just enables certain settings, including recto/verso, and header and footer settings that you may find useful when printing for revision.
For Separators, how you handle breaking up the document depends a lot on how you write and the story you tell. For this scenario, Parts don’t have their own text. They do have a title, and will get printed onto their own page. Chapters will start on a new page as well, with scenes separated by a page break. For printing a copy, particularly if it’s just going to be for revision, you might consider having folder-to-folder and even folder-to-page separators be a blank line, to cut down on the number of pieces of paper to print. This would mean the Part title would appear on the first Chapter page, above the Chapter title, which would appear above the Scene title.
 With the Formatting pane, when printing to revise you might consider the titles being pretty plain, really just enough for you or your editor(s) to be able to distinguish the transitions. Since I have Parts and Chapters, the folder levels should have their own settings (as they do here). Since neither of these two folder types has any text, I uncheck that checkbox. If yours do, say because you use introductions for each chapter or part, make sure the “Text” checkbox is checked, and format the text appropriately.
 When formatting the text files, keep in mind you will probably be marking the pages up with a pen or pencil, so use a line spacing of 2.0 and a readable font, but not too large. Here is where having a distinct set of Formatting Presets is useful. I use a slightly larger font size when editing on screen than for printing or compiling to other formats, so I have a preset for body text editing (with a clear label) as well as a different preset for printing and compiling, as discussed above. Click in the body text area of the pane (that is, not the Title but the actual body text), and select the appropriate preset under the button circled in the image.
Title Adjustments would only need to be adjusted if you use the title prefix or suffix and it will appear on front matter, but you don’t want it to.
The Layout pane should be fine with defaults; you might want to change the “End-of-Text” option if you don’t like the default setting.
When printing for my own editing and revising, I turn off all of the options in the Transformations pane. I want to see the em-dashes, the smart quotes, and italics. You may feel different about your own printed output, and that’s okay!
In the Replacements pane make sure to add any text expansions you need. I sometimes will use this to avoid having to type “Interstellar Consortium for the Stability of Stars and Novae” over and over again, putting ICSSN in the text and using Replacements to make sure it gets expanded upon compiling.
Default settings for Statistics are probably fine unless you need the words in the front matter to count toward your $wc numbers.
Since this is a fiction novel, you are unlikely to have any tables in your document. If you do, check the settings in the Table pane. Ditto for footnotes and comments.
In Page Settings, there are a couple of ways to go. First is to use the “Page Setup” from the File menu, and create custom page sizes there if you need to, then check the “use project Page Settings” box to force the output to use those. Otherwise, you can set your page size and margins here. I always use the header setup with my last name and the current page number, printed in the upper-right corner. That way when I invariably drop my project, I can rearrange them properly. If I have multiple projects going at once, as sometimes happens, I will add the $projecttitle to this as well.
Finally, in Quick Font Override you can do a quick global font change if needed. I rarely need this, but if you decide at the last moment you want to print in Courier instead of Bookman Old Style, you can do a quick setting here for that.
Now, all that's left is to click "Compile," print, and get out your red pencil!
Now, all that's left is to click "Compile," print, and get out your red pencil!
Up Next
Hopefully, this will get you started in the right direction when compiling your Scrivener to print for revising. Next time I’ll walk you through the settings for Word output to submit to an agent or publisher. As always, if you have questions or comments, leave them below, and happy writing!
No comments:
Post a Comment
Note: Only a member of this blog may post a comment.